
Many Australian homeowners will decide to build a deck for their backyard or bbq area. It is a great way to enjoy your yard and entertain guests. A deck can also be used to increase the use of the yard. There’s no doubt that a deck is a good investment.
The first step in building a deck is to draw the dimensions and shape of the deck. I also include the orientation of the decking. Include landmarks such as your home, doors, sheds, fences and so on. I use graph papers to keep scale.
Deck planning is a complex process. To make sure I don’t forget anything, even after many decks I refer to the deck construction code guide. Charts and diagrams are used to determine spans and timber sizes, as well as fastener requirements. Your local deck builder will be the final authority if it is not included in this guide.
Another critical connection is the joist hangers. The joist hangers transfer the load to the beams and ledgers. If you’re using 2×12 joists, you need 2×12 hangers. Deck joist hangers must also comply with corrosion standards. They are coated in a G-185 special coating. Decks near saltwater can be built with stainless steel versions. To fasten the hangers, use the nail size specified by the manufacturer to nail through each hole.
The most stressful part of deck construction is digging the footings. To keep your beam and joist spans in line with your plan, their placement must be exact. The whole project will be complicated if the footings are not placed correctly.
String a mason’s line between the batter boards in order to align your footings parallel to your house. We needed to dig 12 footings that were at least 1.2m in depth. To do this, we rented an auger-equipped track loader. In a single day, we had marked and dug all the footings.
With the total size of your deck, reduce it by 38mm all around. The deck framing will be around this size. The deck boards will be 25mm above the framing.

Want to keep your deck looking beautiful? Read: Deck Maintenance Tips
You could save a lot of energy and time if you just follow this step. Be sure to get your council’s approval before you construct your deck. Every council has their own rules and regulations for the construction of decks, and other home additions. The council will regulate the material that you can use, the site setbacks and structural integrity of your home, as well as the minimum standards for construction.
Ask your local council about the exemptions that apply to your deck.
You will succeed in any home improvement project if you make a plan before you start. This can be done by you or a professional, if that is what you prefer.
Decide which direction your deck will face first. After you have considered the time of day when it will be most used, you will thank yourself for taking the time to consider whether you would like to watch the sunrise or sunset in the east or west. You can then decide if you want to build a solid roof for shade.
Then, measure the height of your deck in relation to your home’s floor level. The majority of people choose one of two options: they either build it at a low level and with steps leading down to an external deck or they build it very low, at the same height as their existing floor.
Checking what is happening under your backyard floor can be a very important step (and one that’s often overlooked) in the planning phase. If you are building a deck in Australia, you should first check what is running underneath. This will save you money and headaches. If something is accidentally cut during construction, it can cause a mess, and even be dangerous. Call the utility company to ask about what is below.
You can then decide what materials you will use to construct your deck. There are four main types of decking that are used. Hardwoods, Treated Pine, Modular decking and Composite decking are the most common. Each material has pros and cons.
Hardwoods offer an attractive natural finish and colour. Merbau, Jarrah and Spotted Gum are some of the most common hardwoods. Hardwoods like Merbau have a lot of natural oils which protect and preserve the wood. You will need to maintain and treat it to ensure longevity.
Treated Pine offers the best value for money. It is treated to resist decay and weathering. Treated Pine can be painted or stained to match any colour scheme. It is easy to handle and lightweight, but it does need to be treated annually to make sure that it lasts.
Composite decking consists of a mixture of wood fibres, recycled plastic and fibre cement. It is a better alternative to timber because it’s more environmentally friendly. It is also almost maintenance-free, as it doesn’t cause the same damage to the environment that timber can. Be prepared to pay more if you choose composite decking.
Modular Decks are generally made of timber and provide a much simpler installation process. It is also more expensive than traditional wood decking.
Once you’ve decided on the material, you need to make sure you have all of the tools and materials you need to turn your decking into a fully functional deck. These are the tools that you should always have on hand when it comes to constructing a deck:
You can easily get these items by visiting your local hardware shop.
Once you have prepared your deck, it is time to measure and mark out the perimeter. Start by measuring the deck’s perimeter and marking it. Don’t forget the height of decking and joists when you are taking measurements. Be sure to include the height of joists in your height measurements. Then, measure the height from the ground up to the mark you made at the end of each sill. Then, you can run string lines around the perimeter at this height.
The next step is to install the temporary timber guides around the perimeter of your decking area. Use your spirit level to ensure they are straight. Mark the end of your deck on the timber with a string. Use the 3-4-5 rule to check that your deck is square.
Refer to your engineering plan to determine the distance between your stumps. Mark the edges and measure from the sill up to the deck. Then, create a grid by running string lines. The stump should be placed at each intersection of the strings. Mark them with spray paint.
The installation of the bearers and stumps requires several steps. Start by digging holes where you sprayed painted the stumps. Be sure to dig them at the right depth as detailed in your plans or permits. Have an inspector check the holes after they are finished.
Join your bearers together with glue and a nail gun. Measure the height of your bearers. This can be done by running your spirit-level from the existing timber work towards brickwork. You can now measure the distance between your spirit level and the brickwork to determine the size of check-out you need. Mark the check out on the bearer using a square set. Be sure to mark both the length and depth of the check out. The deck will be able to support itself over the brickwork.
Then, using a circular blade, cut out the check-out. Be sure to set the depth of the circular saw correctly. After this, you can support and level the bearer and then drill holes to the stumps. Before you cement the stumps in place, make sure that they are secured. Install all other stumps and bearers by repeating the steps above. After the soil has dried overnight, return to fill in the holes after removing all support posts.
It’s now time to install the beams. Start by marking and measuring the wall plate. Then, cut a check-out into the wall plate. Attach the wall plate, and then fix the first joist.
Once you have done this, measure and mark the second joist. Secure the second joist and then all of the others. After you have finished, it is time to install the wood between them.
The decking is now ready to be laid. Cut the decking material into size. After this, align the first piece of decking and secure it with a drill and fastener. You can now proceed to lay the second decking piece, secure it and continue with each successive piece until your deck is completed!
The above is just a guide with tips and things to consider when you want to learn how to build a deck. The guide provided you with the blueprint and basics. Please always use a builder if you are not 100% confident and experienced as it can cost you a lot of money to do it twice!
Enjoy this guide? Also read: 6 Beautiful Deck Ideas For Your Home
Please contact us if you require more detailed information or need the tools or timber.

Are you wanting to start your next project and wanting to know if wood or composite cladding better? A Straightforward Guide
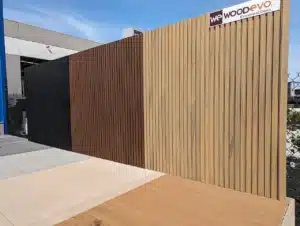
Introducing WoodEvo: Premium Composite Cladding Now Available at Rex Paine Timber At Rex Paine Timber, we takes pride in offering top-quality

6 Beautiful Deck Ideas For Your Home When it comes to creating a beautiful outdoor space, a deck can be the
Are you wanting to start your next project and wanting to know if wood or composite cladding better? A Straightforward Guide
Introducing WoodEvo: Premium Composite Cladding Now Available at Rex Paine Timber At Rex Paine Timber, we takes pride in offering top-quality
6 Beautiful Deck Ideas For Your Home When it comes to creating a beautiful outdoor space, a deck can be the